描述
SparkFun ESP8266 Thing 開發板 (已焊針腳) 美國 SparkFun 原裝進口
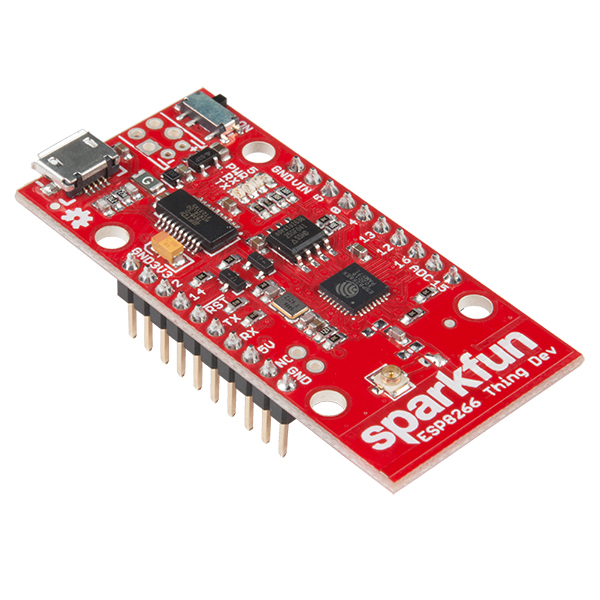
SparkFun ESP8266事情開發板 – 一個針對 ESP8266 所設計的物聯網裝置開發板,集成了FTDI USB到串行芯片。ESP8266 是一款具有成本效益和功能強大的 WiFi 微控制器。像任何微控制器一樣,它可以被編程為閃爍LED,觸發繼電器,監測傳感器或使咖啡機自動化。通過一個集成的WiFi控制器,ESP8266是幾乎所有互聯網連接項目的一站式商店。最重要的是,ESP8266非常易於使用,固件可以在Arduino中開發,並通過簡單的串行接口上傳。ESP8266 Thing開發板使用預先焊接的接頭將所有模塊的引腳分開,而USB到串行轉換器意味著您不需要任何外圍器件來對芯片進行編程。只需插入一根USB電纜,
為什麼這個名字?由於它是物聯網(IoT)項目的完美基礎,因此我們將其稱為“事物”。Thing可以完成所有工作,從使用phant.io開啟LED到發布數據,並且可以像任何微控制器一樣進行編程。您甚至可以通過安裝ESP8266 Arduino插件,通過Arduino IDE對Thing進行編程。
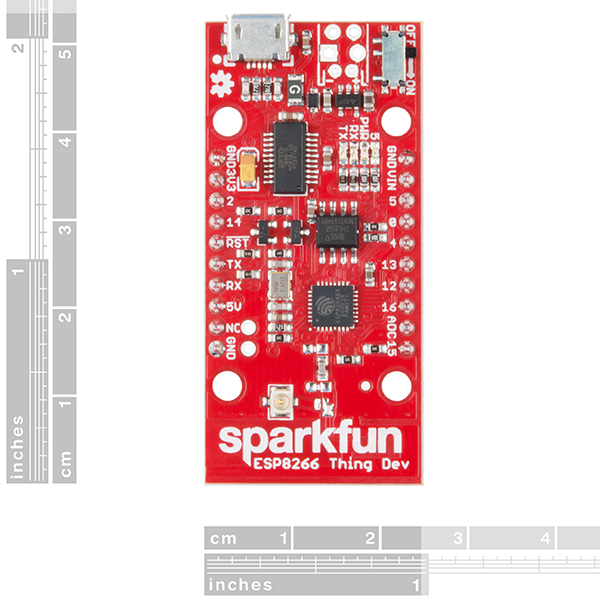
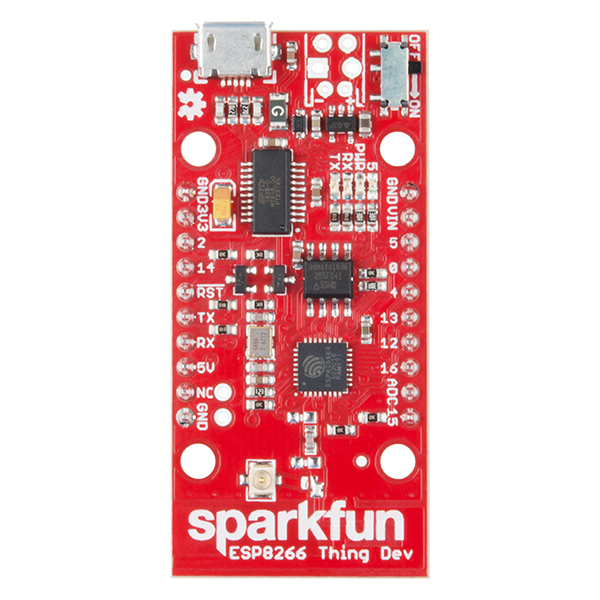
ESP8266事物開發板是一個相對簡單的電路板。引腳分成兩個並行的麵包板兼容行。USB連接器位於一個可選的電源輸入旁邊,一個ON / OFF開關 – 控制ESP8266的電源 – 位於旁邊。朝向電路板內部的LED指示IC的電源,充電和狀態。ESP8266的最大電壓是3.6V,所以Thing有一個板載3.3V穩壓器,為IC提供一個安全,一致的電壓。這意味著ESP8266的I / O引腳也運行在3.3V; 你需要將輸入到IC中的5V信號進行電平轉換。如果您的項目需要USB以外的電源,則Thing Dev Board包含2腳JST,2腳3.5mm螺絲端子或簡單的0.1英寸2腳接腳的腳印,與原來的ESP8266不同,
事物開發板甚至包括一個PCB跡線天線作為默認的WiFi天線。這是成本效益,真的很好!如果您需要連接更敏感的天線,或者需要在機箱外部佈線,則還可以在主板上使用U.FL連接器。一些焊接將需要U.FL連接器的功能,但可以在我們為開發板寫的連接指南中找到說明。
- 板載FTDI USB轉串口
- 802.11 b / g / n
- WiFi直連(P2P),軟AP
- 集成的TCP / IP協議棧
- 集成TR開關,巴倫,LNA,功率放大器和匹配網絡
- 集成的PLL,穩壓器,DCXO和電源管理單元
- 集成的低功耗32位CPU可以用作應用處理器
- 在802.11b模式下+ 19.5dBm輸出功率
- 預焊接頭
Get Started with the ESP8266 Thing 開發指南
規格與特色
- All module pins broken out
- Onboard FTDI USB-to-Serial
- 802.11 b/g/n
- WiFi Direct (P2P), soft-AP
- Integrated TCP/IP protocol stack
- Integrated TR switch, balun, LNA, power amplifier and matching network
- Integrated PLLs, regulators, DCXO and power management units
- Integrated low-power 32-bit CPU could be used as application processor
- +19.5dBm output power in 802.11b mode
- Pre-Soldered Headers
原廠技術文件與範例
- Schematic 概要
- Eagle PCB設計圖
- Hookup Guide 使用教學說明
- ESP8266 Powered Propane Poofer
- ESP8266 Community Forum
- GitHub (Design Files)
- GitHub (Arduino Library)
- Graphical Datasheet
SparkFun ESP8266 Thing – Dev Board (with Headers)
This is the SparkFun ESP8266 Thing Dev Board — a development board that has been solely designed around the ESP8266, with an integrated FTDI USB-to-Serial chip. The ESP8266 is a cost-effective and very capable WiFi-enabled microcontroller. Like any microcontroller, it can be programmed to blink LEDs, trigger relays, monitor sensors or automate coffee makers. With an integrated WiFi controller, the ESP8266 is a one-stop shop for almost any internet-connected project. To top it all off, the ESP8266 is incredibly easy to use; firmware can be developed in Arduino and uploaded over a simple serial interface. The ESP8266 Thing Development Board breaks out all of the module’s pins with pre-soldered headers, and the USB-to-serial converter means you don’t need any peripheral components to program the chip. Just plug in a USB cable, download the Arduino board definitions, and start IoT-ing. Why the name? We lovingly call it the “Thing” due to it being the perfect foundation for your Internet of Things (IoT) project. The Thing does everything from turning on an LED to posting data with phant.io, and can be programmed just like any microcontroller. You can even program the Thing through the Arduino IDE by installing the ESP8266 Arduino add-on. The ESP8266 Thing Development Board is a relatively simple board. The pins are broken out to two parallel, breadboard-compatible rows. The USB connector sits next to an optional power supply input, and an ON/OFF switch — controlling power to the ESP8266 — sits next to that. And LEDs toward the inside of the board indicate power, charge and status of the IC. The ESP8266’s maximum voltage is 3.6V, so the Thing has an onboard 3.3V regulator to deliver a safe, consistent voltage to the IC. That means the ESP8266’s I/O pins also run at 3.3V; you’ll need to level shift any 5V signals running into the IC. If your project requires a power source other than USB, the Thing Dev Board includes footprints for a 2-pin JST, 2-pin 3.5mm screw terminal, or a simple 0.1″-pitch 2-pin header. Unlike the original ESP8266 Thing, the ESP8266 Thing Dev Board does not have a built-in LiPo charger. The Thing Dev Board even includes a PCB trace antenna as a default WiFi antenna. It’s cost-effective and works really well! If you need to connect a more sensitive antenna, or need to route outside an enclosure, a U.FL connector is also available on the board. Some soldering will be required to get the U.FL connector functioning, but instructions can be found in the Hookup Guide we have written for the dev board. Note: We’ve provided a few Example Sketches to experiment with on your SparkFun ESP8266 Thing Development Board. These sketches can be found in the Hookup Guide in the Documents section below! Get Started with the ESP8266 Thing Dev Guide
FEATURES
- All module pins broken out
- Onboard FTDI USB-to-Serial
- 802.11 b/g/n
- WiFi Direct (P2P), soft-AP
- Integrated TCP/IP protocol stack
- Integrated TR switch, balun, LNA, power amplifier and matching network
- Integrated PLLs, regulators, DCXO and power management units
- Integrated low-power 32-bit CPU could be used as application processor
- +19.5dBm output power in 802.11b mode
- Pre-Soldered Headers
INCLUDES
DOCUMENTS
- Schematic 概要
- Eagle PCB設計圖
- Hookup Guide 使用教學說明
- ESP8266 Powered Propane Poofer
- ESP8266 Community Forum
- GitHub (Design Files)
- GitHub (Arduino Library)
- Graphical Datasheet


